- Announcements
- BBQ and Food
- Cars
- Computing
- Cool Stuff
- Current Events
- Electric Vehicles
- Electronics
- Energy
- Flashahaulism
- Funny
- Government
- Hints and Tips
- History
- HVAC
- Induction heating
- Internet
- Lighting
- Misc
- Neon and other lighting
- Nuclear
- Personal
- Pets
- Philosophy
- Photography
- Power Generation
- Product Reviews
- Projects
- Q and A
- RV/Camping
- Science
- Tellico
Categories
Blogroll
 Print This Post
Emergency Standby Lantern
PermaLinkAnd good for camping too.
Question:
>There are a few of us on this list interested in flashlights and similar
>devices. I’m looking for a camping/power outage lantern. Picture a
>propane lantern or slightly smaller, but battery powered. I’d prefer
>something that took D cells, but lantern batteries would be OK, I’d have
>to think about typical rechargeable cells as that would be one more thing to
>maintain. I have lots of flashlights, but this needs to be room lighting,
>not strong beam. (I have the HID light for strong beam. heh)
>
>Oh, I’d like to keep it <$50, so no exotic stuff please. Yes, that rules
>out the surplus tank spotlights, etc.
Just happens that I have a couple of lanterns that fit the bill. Let’s take a look.
Little Lantern
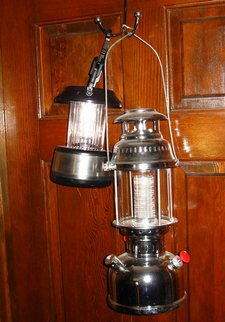
I believe that this is an Ozark brand from Wallyworld. A friend of mine who knows I’m a flashahaulic picked it up for me for the princely sum of $11. It has variable brightness (true PWM and not just a power resistor), solar charging and a power cord for 120 or 12 volts in the base. The second photo shows it next to the second lantern we’ll look at later.
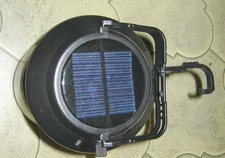
This photo shows the multi-purpose hook and the teeny tiny solar charger. The pamphlet that came with the lantern claims that 4-6 hours of direct sunlight will charge it. I don’t believe it, especially after opening up the battery compartment. Photos below. Hmm, elsewhere in the pamphlet it says that it needs three full days in the sun for a full charge. Ain’t Chinglish cute? Interestingly enough only the top part is lantern, the rest is just for show and to hold the charging cables.
Here’s the actual lantern with the base sitting in the background. One technically doesn’t need the base. One can flip the handle down sideways and sit the thing on the solar panels. This might be handy for hiking or other lightweight applications where the 12/120 volt chargers aren’t needed.
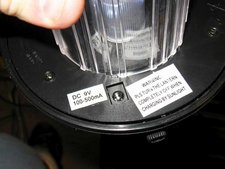
The Charging port. Most anything from 7 volts up to about 15 volts will work. There’s an LM7805 linear regulator inside and the batteries are 3.75 nom volts so anything that will make the regulator work will charge the batteries. The regulator isn’t heat-sunk so I’d not go much above 15 volt. With a heat sink on the regulator, it would probably go above 24 volts, making it handy on ships and the military and other 24 volt applications. This is conjecture on my part so don’t try it unless you know what you’re doing.
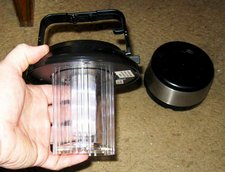
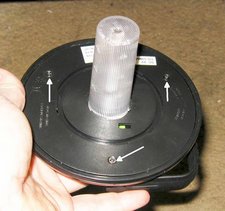
Here’s the lantern with the external globe removed. The inner globe supports a stick of 7mm LEDs. Nothing to write home about in the performance department but they do work. the three arrows point to the screws to be removed to get to the batteries.
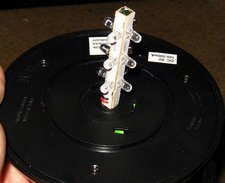
Here’s the actual LED stick. Four pieces of PCB soldered/glue together to hold the LEDs. They hang loose by the wire in this photo. The inner plastic globe supports them.
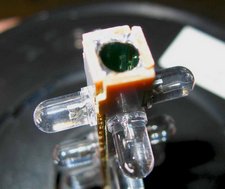
Up-close look at the LED stack.
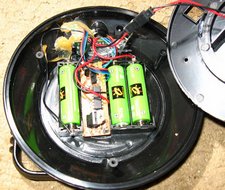
Removing the three screws reveals the guts. three 1000 mah NiCad (NOT NiMH which would self-discharge too rapidly), a PCB with some parts, a battery level meter under the brown blob and the brightness knob.
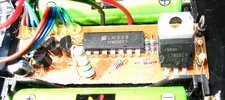
Closeup of the guts. The LM7805 regulates the charging of the 3 batteries. The LM339 is part of the PWM dimming circuit. I’m guessing that the three transistors on the three LED battery state indicator. I didn’t take the board off and trace out the circuit but from the way the components are arranged, that description makes sense. The big resistor standing on end regulates the trickle current to the batteries from the external input jack.
A close-up of the batteries. It’s hard to read but it says 1000 mah. The best part is that it is in a socket like the other two. The last thing I did before I put the thing back together was to install 3 Ray-O-Vac Hybrid 2100 mah low self-discharge NiMH batteries. I just more than doubled the run time. Speaking of which, the run time with the stock batteries is claimed to be six hours. I believe it. I’ve had it on with the stock batteries for over 3 hours now and 2 of the 3 LEDs are still on.
You can get an idea of state-of-charge by watching the battery indicator LEDs as you turn up the brightness. The higher the brightness before the third LED goes out, the more charge left. I’m at about half brightness right now. Not to confuse things, that’s half brightness before the 3rd LED goes out. I’m testing the life on full power.
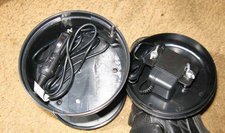
Here’s what’s inside the lantern base. A wall wart held in place with two thumb nuts and a 12 volt charging cord. They both work fine.
Does it work?
In a word, Yes. I can take it outside and walk around and have enough light to see the ground with. Given my horrible eyesight, that’s saying something. It also passes my lounge chair test – sort of. This test is to hang it right above my lounge chair with aluminum foil on one half to reflect all the light my way, sit down in the chair and read. Or try to. A normal person could read just fine. My eyes are just bad enough that I can’t quite do it. Understand that my normal reading light is either a 50 watt halogen lamp or a 35 watt HID light.
All three modes of charging work. The three day part doesn’t give me a woodie but then again, I probably would not be using it for 6 hours every night in a lightweight hiking situation. One could always get a crank generator or even carry spare cells since they’re in sockets.
Worth $11? Damn straight. I’ve asked my friend to pick me up some more of ’em.
Large Lantern.
The Petromax lantern, invented before the first World War is famous for both its light output and its ability to burn almost anything liquid. I have both an original Petromax from between the wars and an ChiCom clone. The claimed light output is equiv to a 150 watt bulb and I believe every bit of it. Probably more if you have the endurance to pump the thing or use a tire valve adapter like I do.
I had one that I got at a flea market that I’d been planning for some time to convert to either LED or HID. It is a Chicom knockoff and is missing some parts. Those plans kinda got detoured when I saw an already-made Chicom knockoff LED version at Sportsman’s Warehouse. I was going to point you to the product but it seems like Sportsman’s Warehouse is the only company left in the world that doesn’t have an on-line catalog in 2008!. Oh well. This is a chiCom knockoff so it’s probably available somewhere else.
This thing was right at the top of my mad money threshold for the day at $49.99. I passed it by. The notion festered in the back of my head so the next time I visited the store I got one. I’m mostly happy. First, some pix.
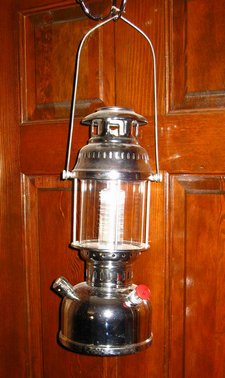
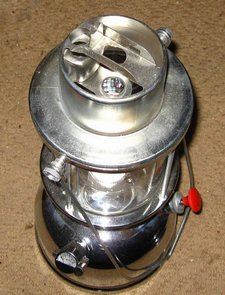
Here it is hanging on a clothes hangar on my door. Big ole thang ain’t it?
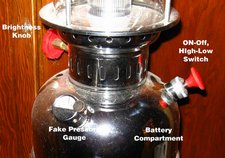
Here are the major parts identified. If you didn’t look closely, you’d think this to be the kerosene version. About the only thing that’s missing is the pre-heat burner. The brightness knob actually turns the brightness up and down. The “pump” actually operates a 3-way switch that turns either half or all the LEDs on. The pressure indicator is the real thing but it doesn’t do anything. Other than be a spare for my real Petromaxes, of course :-)
Closeup of the knob. Yep, that’s the brass valve body from the kerosene version.
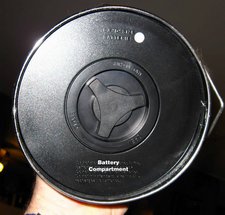
Here’s where the difference starts. Where there would normally be a concave metal bottom, there’s a plastic screw off battery holder.
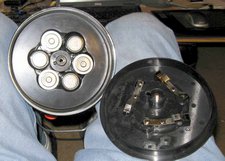
That actually holds 9 volts’ worth of D cells. Shazam! Lots of wasted space in there, though. More on that in a minute.
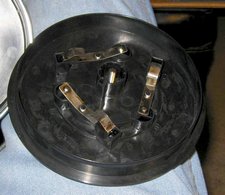
The battery contacts. Fairly decent quality as ChiCom contacts go.
Here’s the lantern with the “chimney” removed. Yep, that’s a standard heat shield and generator holder from the kerosene one. In ChiCom land it’s probably cheaper to leave all that stuff in than it is to make a special manufacturing run.
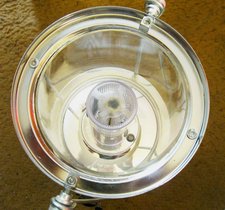
With the heat shield/generator holder removed, you can see the LED stack. Lots ‘o LEDs. I didn’t disassemble this lantern any farther because I’m getting tired and because I need to take it apart to fix it.
Does it work?
Yes and No. When I first got it, it worked fine. Half the LED setting was bright enough for most things. All the LEDS on and the brightness set full bore makes the thing at least as bright as a single mantle Coleman lantern. This is more than enough light for either a camping or emergency lantern. With around 20 amp-hours in a D cell alkaline, it should run for days, especially on the “half LED setting”.
Then the damned switch quit working! At first it would only turn on the half setting. If I operated it several times, the full setting would sometimes come on. Then it would not turn off. The low setting on the brightness knob is so dim that I forgot about it, left it on and ran down the batteries.
OK, so this is ChiCom quality control at its worst. If I didn’t live 100 miles away from the store I could have taken it back in and gotten a new one. I do and I didn’t so I’m going to fix it. Actually I’m going to modify it greatly. All that wasted space seen above in the battery compartment? Gone. In its place are going to be as many power tool lithium batteries as I can cram in. A friend is the authorized service center for Milwaukee in this area and they’ve warranted a number of 28 volt lithium packs. The old ones go to the trash. Just call me trash :-) Invariably only one bad cell. The rest are smoking hot with electricity and ready to bore holes in wood, steel or the darkness.
OK, the first mod will be to put the Lithium batteries in there. I hope that I can get a multiple series/parallel that works out to nearly 12 volts. If I can, the next mod is going to be a 35 watt HID lamp and ballast. Yep, the same one used in high end car headlights. With the lamp mounted vertically, this thing ought to be as bright as the fuel version and last nearly as long on a charge as a tank of fuel lasts.
Would I buy it again?
Yeah but probably not from Sportsman’s Warehouse. The price is on the high end of my tolerance range for a light like this. I’d pay $49.99 again but only if I couldn’t find it on the net cheaper. And I’d sit out in the car and abuse it a little before driving off like I do anything from a big box store anymore. Saves gas and frustration. It’s going to be a great light when I get through with it.
Sportsman’s warehouse is a bad place to visit. So many toys, so little money. Being a flashahaulic doesn’t help. They carry all the major overpriced brands of LED and “tactical” lights. One little lantern keeps whispering “Hey big boy. Go ahead and buy me. You know you’re going to. Better now than later. Delayed gratification isn’t what it’s cut out to be.”
The one I’m speaking of (of course, no website to point it out) is a super light weight extreme hiker’s lantern with a woven platinum wire mantle. And a price to match. Now the Arctic ice caps will melt, hell will freeze over, they’ll find life on Mars and a democrat will go for more oil exploration before I ever go hiking but I’m gonna buy the lantern sooner or later anyway!
When you’re a flashahaulic, that doesn’t matter. A flashahaulic turns off that fine nuclear power supplied by TVA and sits in his warm cozy house enjoying his camping or emergency or whatever lights. Can’t help it. Don’t want to help it. I’m not a recovering flashahaulic. I am a flashahaulic!!!
Continue on for More Options
The Electronic Candle
This is yet another option if you carry a pocket LED flashlight (and what self-respecting flashahaulic wouldn’t?). If your pocket LED light is made right, it can serve as an electronic candle. Here’s how.
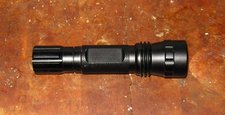
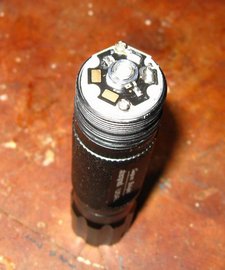
Here is one that is made correctly. Three important characteristics.
-
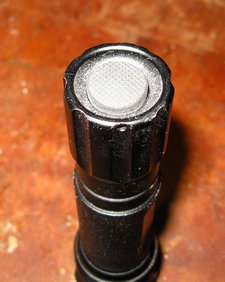
The “Clickie” is indented or protected
-
The reflector screws off
-
The LED is above the body
Here we see the first part. The “Clickie is recessed inside the body. That means that the flashlight can stand on end.
Here we see how the reflector screws off and leaves the LED sticking up above the body. A standard power LED emits over an almost hemispheric area. Therefore if it sticks up in the open, it will throw light in all directions.
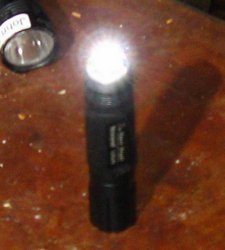
Here it is lit and standing on end. Obviously my camera didn’t like all that light very much, as the auto-focus didn’t.
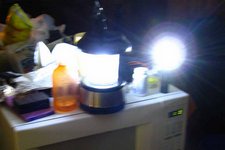
This shows the “candle” next to the first lantern that I examined. One can see how much brighter one power LED is than a whole collection of 7mm ones.
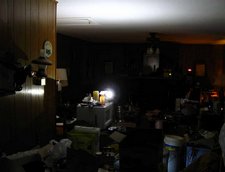
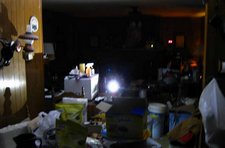
Here is the room lit up. The camera doesn’t show it but I can see objects all over the room. More than enough light to walk around in. This also shows how well the electronic image stabilization on my Canon works. I shot this flash-less, free-handed with one second exposure. Try THAT with your high-zoot DSLR! Without your gyro-stabilized $10,000 lens, of course :-)
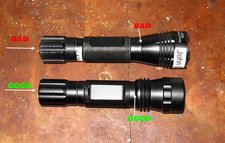
This shows two almost identical-looking ChiCom LED pocket lights. The top one is BAD because the clickie sticks out, preventing it from standing on end and b) The reflector is glued, pressed or otherwise not removable by mortal means.
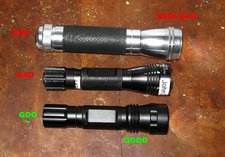
Yet another Good-Bad pix, this time including the Lowe’s house brand light. It has a lot going for it. First, it’s cheap at $29. Second, it uses C cells, available anywhere. Third, it uses a TIR (total internal Reflector) instead of a lens that can get wet and corrode. Forth, the LED is ALMOST level with the body when the lens is removed and fifth, it’s friggin bright!.
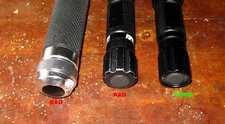
This shot shows the end. The Lowe’s light is “bad” in that it has a rounded end. However, its other features make it worth considering since it can be stood up in a vase or coffee cup.
Here’s the room lit up by the Lowe’s light. Same camera settings. Bright sucker, ain’t it? It’s sitting in a coffee cup.
This is a half-assed shot of the LED. The LED and the aluminum is so reflective that I had a practically impossible time lighting it with my pocket rocket camera. Nonetheless, you can see the way the LED is arranged. Even better, if you want to put one of the current state-of-the-art LEDs in place of that one, all you do is unscrew it, unsolder the wires and reverse the process with the new one.
One note. Lowe’s bought a bunch of these that used the 1 watt Luxor LED. Later they swapped over to the Cree 3 watt LED but they kept the stock number the same. The only indications are on the transition packaging it says “Cree LED” and “60X brighter”. The LED almost always has a white substrate when viewed through the lens.
This transition was going on over a year ago as of this writing so I’m fairly sure the 1 watters are out of the supply chain. The last couple of times I’ve been in Lowe’s I’ve noticed new packaging that doesn’t mention Cree or 60X brighter but the LED looks like a Cree. They maybe have gone to something even brighter now.
The real test is when you get it home. Turn it on in a dark room. If it doesn’t knock your socks off with its brightness then you either have dead batteries or you got a 1 watter. Take it back and go to another store. There was and probably still is a long discussion about this light on the Candlepower Forums. That’s the place to catch up on the latest Lowe’s news.
As for finding the right pocket light from Deal Extreme or QualityChinaGoods, you mainly have to ask. Most products have photos of the clickie so you can tell about that. You’ll probably have to email about whether the reflector can be removed and the light used in “candle mode”. They should be familiar with that term.
Well, that about wraps it up. Enjoy
John
Posted by neonjohn on November 22nd, 2008 under Cool Stuff, Flashahaulism, Q and A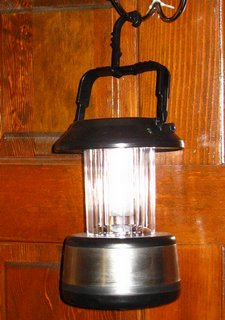


November 22nd, 2008 at 12:49 pm
So how does the little lantern charge with the low self discharge NiMh cells? Does it still recharge OK?
Did you see that Radio Shack was clearing out their version of the low self discharge cells? 2xAA packs were around $2 each.
Ed
November 30th, 2008 at 11:21 pm
Hm. Two cell LiIon is about 8.2-8.4v fully charged, down to about 6.0v discharged. So, that’s going to be a little low for something designed to run off 9V, although the LEDs will last longer if driven with a lower voltage.
Three cells will give you about 12.3-12.6V fully charged and about 9.0V discharged. That might shorten the life of the LEDs, or kill them. It depends on how they’ve put the system together.
I’d be tempted to go with the concept of less cells and you might find that then the full brightness setting will be about right.
Come to think of it – how do they do the reduce brightness? PWM? That would be the clever way to do it. If you can fiddle with the PWM circuit, or just replace it, then you can do my favourite trick with LEDs which is to run them at higher than normal voltage but with low duty cycle. It *appears* very bright while using a lot less power. That might allow you to safely run them off 12V worth of cells – if you limit the maximum duty cycle to prevent them from overheating with the extra voltage.
I assume you’re good with electronics and won’t need my help but if you want some advice on how to build a PWM controller I’ve built a great many :)
I really love these little Atmel Tiny line of microcontrollers. They’re something like a buck each, and contain PWM (and in some cases ADC). It just isn’t worth building a discrete PWM circuit when you can just use one of those and program it to do whatever you want. For example I used one as the LED brightness controller in a VU meter I built. The LEDs in the VU meter have a common anode driven by a P-channel FET, and the Atmel Tiny13 control the FET gate. It’s constantly reading the ADC, and changing the FET gate duty cycle to be proportional to the voltage reading it gets off the ADC. Then I just connect a pot between ground and VCC, with the wiper connected to the ADC sense pin. So you can choose your frequency, and use the pot to adjust duty cycle between 0 and 100%, with all of three parts (the chip, a bypass cap, and the pot).
November 30th, 2008 at 11:31 pm
Oh, of course, there’s another option. You could also connect a buck or boost (or buck/boost, etc.) regulator to the battery pack. That has the advantage of giving you consistent brightness regardless of the battery voltage, and allows you to arbitrarily increase the battery voltage (within the input limits of the regulator). It has the disadvantage of being less than 100% efficient, although you can achieve 95% if you try.
The even slightly more clever way to do it would be to use something like the Tiny13 microcontroller and a low on-resistance FET to pulse power to the LEDs. You could have it sense the battery voltage and adjust the duty cycle to give you consistent brightness as the batteries discharge, but without the need for an inductor, since you really don’t need to drive LEDs with DC.
However, that’s probably getting more fancy than is strictly necessary :)